射影量子カーネルを用いた特徴分類の強化
使用量の目安: Heron r3 プロセッサで約80分(注意: これはあくまで目安です。実際の実行時間は異なる場合があります。)
学習成果
このチュートリアルを通じて、ユーザーは以下を理解できるようになります。
- 射影量子カーネル(PQK)の仕組みと、潜在的な量子アドバンテージが期待できる場面。
- 実世界のデータセットを使用して、実際のハードウェア上で PQK を実行する方法。
前提知識
このチュートリアルを始める前に、ユーザーが以下のトピックに精通していることを推奨します。
- IBM Quantum® Learning の 量子機械学習コース に含まれる Quantum kernels
背景
このチュートリアルでは、論文 Enhanced Prediction of CAR T-Cell Cytotoxicity with Quantum-Kernel Methods [1] に基づき、実世界の生物学的データセットに対して Qiskit を用いた射影量子カーネル(PQK)の実行方法を示します。
PQK は量子機械学習(QML)で使用される手法であり、古典データを量子特徴空間にエンコードし、量子コンピュータを活用して特徴選択を強化することで、それらを古典領域に射影し直します。この手法では、量子回路を用いて古典データを量子状態にエンコードします。これは通常、特徴マッピングと呼ばれるプロセスを通じて行われ、データが高次元のヒルベルト空間に変換されます。「射影」の側面は、特定のオブザーバブルを測定することによって量子状態から古典的な情報を抽出し、サポートベクターマシンなどの古典的なカーネルベースのアルゴリズムで使用できるカーネル行列を構築することを指します。このアプローチは、量子システムの計算上の利点を活用することで、特定のタスクにおいて古典的な手法と比較してより良い性能を達成できる可能性があります。
PQK の主要な構成要素は縮約密度行列(RDM)であり、量子特徴マップの射影測定を通じて得られます。特に、通常は各量子ビットに対する単一量子ビット縮約密度行列(1 RDM)を計算します。これらの測定量は、指数カーネルなどの古典的なカーネル関数への入力として使用され、最終的なカーネル行列が構築されます。
PQK は標準的な量子カーネルに比べて潜在的な利点があり、特に短期的な(近い将来の)量子ハードウェアに適しています。標準的な量子カーネルは通常、グローバルな状態重なりの推定に依存していますが、量子ビット数が増えるにつれて正確な測定が困難になり、ノイズに対して非常に敏感です。一方、PQK は単一量子ビット縮約密度行列(1 RDM)などの局所的なオブザーバブルを使用するため、サンプリングのオーバーヘッドが低く、ハードウェアノイズへの耐性が高く、スケーラビリティも優れています。古典的なカーネル関数を適用する前に量子状態を局所的な測定特徴に射影することで、PQK は有用な量子相関を保持しながら、近い将来のデバイスにとってより実用的な手法となっています。
要件
このチュートリアルを始める前に、以下がインストールされていることを確認してください。
- Qiskit SDK v2.0 以降(visualization サポート付き)
- Qiskit Runtime v0.40 以降(
pip install qiskit-ibm-runtime) - Category encoders 2.8.1(
pip install category-encoders) - NumPy 2.3.2(
pip install numpy) - Pandas 2.3.2(
pip install pandas) - Scikit-learn 1.7.1(
pip install scikit-learn) - Tqdm 4.67.1(
pip install tqdm)
セットアップ
# Added by doQumentation — required packages for this notebook
!pip install -q category-encoders numpy pandas qiskit qiskit-ibm-runtime scipy scikit-learn tqdm
import warnings

# Standard libraries
import os
import numpy as np
import pandas as pd

# Machine learning and data processing
import category_encoders as ce
from scipy.linalg import inv, sqrtm
from sklearn.metrics.pairwise import rbf_kernel
from sklearn.model_selection import GridSearchCV, StratifiedKFold
from sklearn.svm import SVC

# Qiskit and Qiskit Runtime
from qiskit import QuantumCircuit
from qiskit.circuit import ParameterVector
from qiskit.circuit.library import UnitaryGate, ZZFeatureMap
from qiskit.quantum_info import SparsePauliOp, random_unitary
from qiskit.transpiler import generate_preset_pass_manager
from qiskit_ibm_runtime import (
    Batch,
    EstimatorOptions,
    EstimatorV2 as Estimator,
    QiskitRuntimeService,
)

# Progress bar
import tqdm

warnings.filterwarnings("ignore")
小規模シミュレーター例
このチュートリアルでは、射影量子カーネルが大規模システムおよび実際のハードウェアにどのようにスケールできるかを示すことを主な目的としているため、小規模シミュレーター例は省略します。
大規模ハードウェア例
ステップ 1: 古典的な入力を量子問題にマッピングする
データセットの準備
このチュートリアルでは、二値分類タスクのために実世界の生物学的データセットを使用します。このデータセットは Daniels et al. (2022) によって生成されたもので、論文に含まれる補足資料からダウンロードできます。データは CAR T 細胞で構成されています。CAR T 細胞とは、特定のがんの治療に用いられる免疫療法において使用される遺伝子改変 T 細胞です。免疫細胞の一種である T 細胞は、がん細胞上の特定のタンパク質を標的とするキメラ抗原受容体(CAR)を発現するように研究室で改変されます。これらの改変 T 細胞は、がん細胞をより効果的に認識し破壊することができます。データの特徴量は CAR T 細胞のモチーフであり、T 細胞に組み込まれた CAR の特定の構造的または機能的構成要素を指します。これらのモチーフに基づいて、与えられた CAR T 細胞の細胞毒性を予測し、毒性あり(toxic)または毒性なし(non-toxic)としてラベル付けすることが私たちのタスクです。 以下に、このデータセットを前処理するためのヘルパー関数を示します。
def preprocess_data(dir_root, args):
    """
    Preprocess the training and test data.
    """
    # Read from the csv files
    train_data = pd.read_csv(
        os.path.join(dir_root, args["file_train_data"]),
        encoding="unicode_escape",
        sep=",",
    )
    test_data = pd.read_csv(
        os.path.join(dir_root, args["file_test_data"]),
        encoding="unicode_escape",
        sep=",",
    )

    # Fix the last motif ID
    train_data[train_data == 17] = 14
    train_data.columns = [
        "Cell Number",
        "motif",
        "motif.1",
        "motif.2",
        "motif.3",
        "motif.4",
        "Nalm 6 Cytotoxicity",
    ]
    test_data[test_data == 17] = 14
    test_data.columns = [
        "Cell Number",
        "motif",
        "motif.1",
        "motif.2",
        "motif.3",
        "motif.4",
        "Nalm 6 Cytotoxicity",
    ]

    # Adjust motif at the third position
    if args["filter_for_spacer_motif_third_position"]:
        train_data = train_data[
            (train_data["motif.2"] == 14) | (train_data["motif.2"] == 0)
        ]
        test_data = test_data[
            (test_data["motif.2"] == 14) | (test_data["motif.2"] == 0)
        ]

    train_data = train_data[
        args["motifs_to_use"] + [args["label_name"], "Cell Number"]
    ]
    test_data = test_data[
        args["motifs_to_use"] + [args["label_name"], "Cell Number"]
    ]

    # Adjust motif at the last position
    if not args["allow_spacer_motif_last_position"]:
        last_motif = args["motifs_to_use"][len(args["motifs_to_use"]) - 1]
        train_data = train_data[
            (train_data[last_motif] != 14) & (train_data[last_motif] != 0)
        ]
        test_data = test_data[
            (test_data[last_motif] != 14) & (test_data[last_motif] != 0)
        ]

    # Get the labels
    train_labels = np.array(train_data[args["label_name"]])
    test_labels = np.array(test_data[args["label_name"]])

    # For the classification task use the threshold to binarize labels
    train_labels[train_labels > args["label_binarization_threshold"]] = 1
    train_labels[train_labels < 1] = args["min_label_value"]
    test_labels[test_labels > args["label_binarization_threshold"]] = 1
    test_labels[test_labels < 1] = args["min_label_value"]

    # Reduce data to just the motifs of interest
    train_data = train_data[args["motifs_to_use"]]
    test_data = test_data[args["motifs_to_use"]]

    # Get the class and motif counts
    min_class = np.min(np.unique(np.concatenate([train_data, test_data])))
    max_class = np.max(np.unique(np.concatenate([train_data, test_data])))

    num_class = max_class - min_class + 1
    num_motifs = len(args["motifs_to_use"])
    print(str(max_class) + ":" + str(min_class) + ":" + str(num_class))

    train_data = train_data - min_class
    test_data = test_data - min_class

    return (
        train_data,
        test_data,
        train_labels,
        test_labels,
        num_class,
        num_motifs,
    )

def data_encoder(args, train_data, test_data, num_class, num_motifs):
    """
    Use one-hot or binary encoding for classical data representation.
    """
    if args["encoder"] == "one-hot":
        # Transform to one-hot encoding
        train_data = np.eye(num_class)[train_data]
        test_data = np.eye(num_class)[test_data]

        train_data = train_data.reshape(
            train_data.shape[0], train_data.shape[1] * train_data.shape[2]
        )
        test_data = test_data.reshape(
            test_data.shape[0], test_data.shape[1] * test_data.shape[2]
        )

    elif args["encoder"] == "binary":
        # Transform to binary encoding
        encoder = ce.BinaryEncoder()

        base_array = np.unique(np.concatenate([train_data, test_data]))
        base = pd.DataFrame(base_array).astype("category")
        base.columns = ["motif"]
        for motif_name in args["motifs_to_use"][1:]:
            base[motif_name] = base.loc[:, "motif"]
        encoder.fit(base)

        train_data = encoder.transform(train_data.astype("category"))
        test_data = encoder.transform(test_data.astype("category"))

        train_data = np.reshape(
            train_data.values, (train_data.shape[0], num_motifs, -1)
        )
        test_data = np.reshape(
            test_data.values, (test_data.shape[0], num_motifs, -1)
        )

        train_data = train_data.reshape(
            train_data.shape[0], train_data.shape[1] * train_data.shape[2]
        )
        test_data = test_data.reshape(
            test_data.shape[0], test_data.shape[1] * test_data.shape[2]
        )

    else:
        raise ValueError("Invalid encoding type.")

    return train_data, test_data
以下のセルを実行することで、このチュートリアルを実行できます。必要なフォルダ構造が自動的に作成され、訓練ファイルとテストファイルの両方が環境に直接ダウンロードされます。これらのファイルがすでにローカルにある場合でも、バージョンの一貫性を確保するために安全に上書きされます。
## Download dataset

# Create data directory if it doesn't exist
!mkdir -p data_tutorial/pqk

# Download the training and test sets from the official Qiskit documentation repo
!wget -q --show-progress -O data_tutorial/pqk/train_data.csv \
  https://raw.githubusercontent.com/Qiskit/documentation/main/datasets/tutorials/pqk/train_data.csv

!wget -q --show-progress -O data_tutorial/pqk/test_data.csv \
  https://raw.githubusercontent.com/Qiskit/documentation/main/datasets/tutorials/pqk/test_data.csv

!wget -q --show-progress -O data_tutorial/pqk/projections_train.csv \
  https://raw.githubusercontent.com/Qiskit/documentation/main/datasets/tutorials/pqk/projections_train.csv

!wget -q --show-progress -O data_tutorial/pqk/projections_test.csv \
  https://raw.githubusercontent.com/Qiskit/documentation/main/datasets/tutorials/pqk/projections_test.csv

# Check the files have been downloaded
!echo "Dataset files downloaded:"
!ls -lh data_tutorial/pqk/*.csv
args = {
    "file_train_data": "train_data.csv",
    "file_test_data": "test_data.csv",
    "motifs_to_use": ["motif", "motif.1", "motif.2", "motif.3"],
    "label_name": "Nalm 6 Cytotoxicity",
    "label_binarization_threshold": 0.62,
    "filter_for_spacer_motif_third_position": False,
    "allow_spacer_motif_last_position": True,
    "min_label_value": -1,
    "encoder": "one-hot",
}
dir_root = "./"

# Preprocess data
train_data, test_data, train_labels, test_labels, num_class, num_motifs = (
    preprocess_data(dir_root=dir_root, args=args)
)

# Encode the data
train_data, test_data = data_encoder(
    args, train_data, test_data, num_class, num_motifs
)
14:0:15
また、スケーリングのためにデータセットを変換し、 を として表現します。
# Change 1 to pi/2
angle = np.pi / 2

tmp = pd.DataFrame(train_data).astype("float64")
tmp[tmp == 1] = angle
train_data = tmp.values

tmp = pd.DataFrame(test_data).astype("float64")
tmp[tmp == 1] = angle
test_data = tmp.values
訓練データセットとテストデータセットのサイズと形状を確認します。
print(train_data.shape, train_labels.shape)
print(test_data.shape, test_labels.shape)
(172, 60) (172,)
(74, 60) (74,)
ステップ 2: 量子ハードウェア実行のための問題の最適化
量子回路
ここで、古典的なデータセットをより高次元の特徴空間に埋め込む特徴マップを構築します。この埋め込みには、Qiskit の ZZFeatureMap を使用します。
feature_dimension = train_data.shape[1]
reps = 24
insert_barriers = True
entanglement = "pairwise"

# ZZFeatureMap with linear entanglement and a repetition of 2
embed = ZZFeatureMap(
    feature_dimension=feature_dimension,
    reps=reps,
    entanglement=entanglement,
    insert_barriers=insert_barriers,
    name="ZZFeatureMap",
)
embed.decompose().draw(output="mpl", style="iqp", fold=-1)

もう一つの量子埋め込みオプションとして、1D ハイゼンベルグ・ハミルトニアン発展アンザッツがあります。ZZFeatureMap を使用して続行する場合は、このセクションの実行をスキップしても構いません。
feature_dimension = train_data.shape[1]
num_qubits = feature_dimension + 1
embed2 = QuantumCircuit(num_qubits)
num_trotter_steps = 6
pv_length = feature_dimension * num_trotter_steps
pv = ParameterVector("theta", pv_length)
# Add Haar random single qubit unitary to each qubit as initial state
np.random.seed(42)
seeds_unitary = np.random.randint(0, 100, num_qubits)
for i in range(num_qubits):
rand_gate = UnitaryGate(random_unitary(2, seed=seeds_unitary[i]))
embed2.append(rand_gate, [i])
def trotter_circ(feature_dimension, num_trotter_steps):
num_qubits = feature_dimension + 1
circ = QuantumCircuit(num_qubits)
# Even
for i in range(0, feature_dimension, 2):
circ.rzz(2 * pv[i] / num_trotter_steps, i, i + 1)
for i in range(0, feature_dimension, 2):
circ.rxx(2 * pv[i] / num_trotter_steps, i, i + 1)
for i in range(0, feature_dimension, 2):
circ.ryy(2 * pv[i] / num_trotter_steps, i, i + 1)
# Odd
for i in range(1, feature_dimension, 2):
circ.rzz(2 * pv[i] / num_trotter_steps, i, i + 1)
for i in range(1, feature_dimension, 2):
circ.rxx(2 * pv[i] / num_trotter_steps, i, i + 1)
for i in range(1, feature_dimension, 2):
circ.ryy(2 * pv[i] / num_trotter_steps, i, i + 1)
return circ
# Hamiltonian evolution ansatz
for step in range(num_trotter_steps):
circ = trotter_circ(feature_dimension, num_trotter_steps)
if step % 2 == 0:
embed2 = embed2.compose(circ)
else:
reverse_circ = circ.reverse_ops()
embed2 = embed2.compose(reverse_circ)
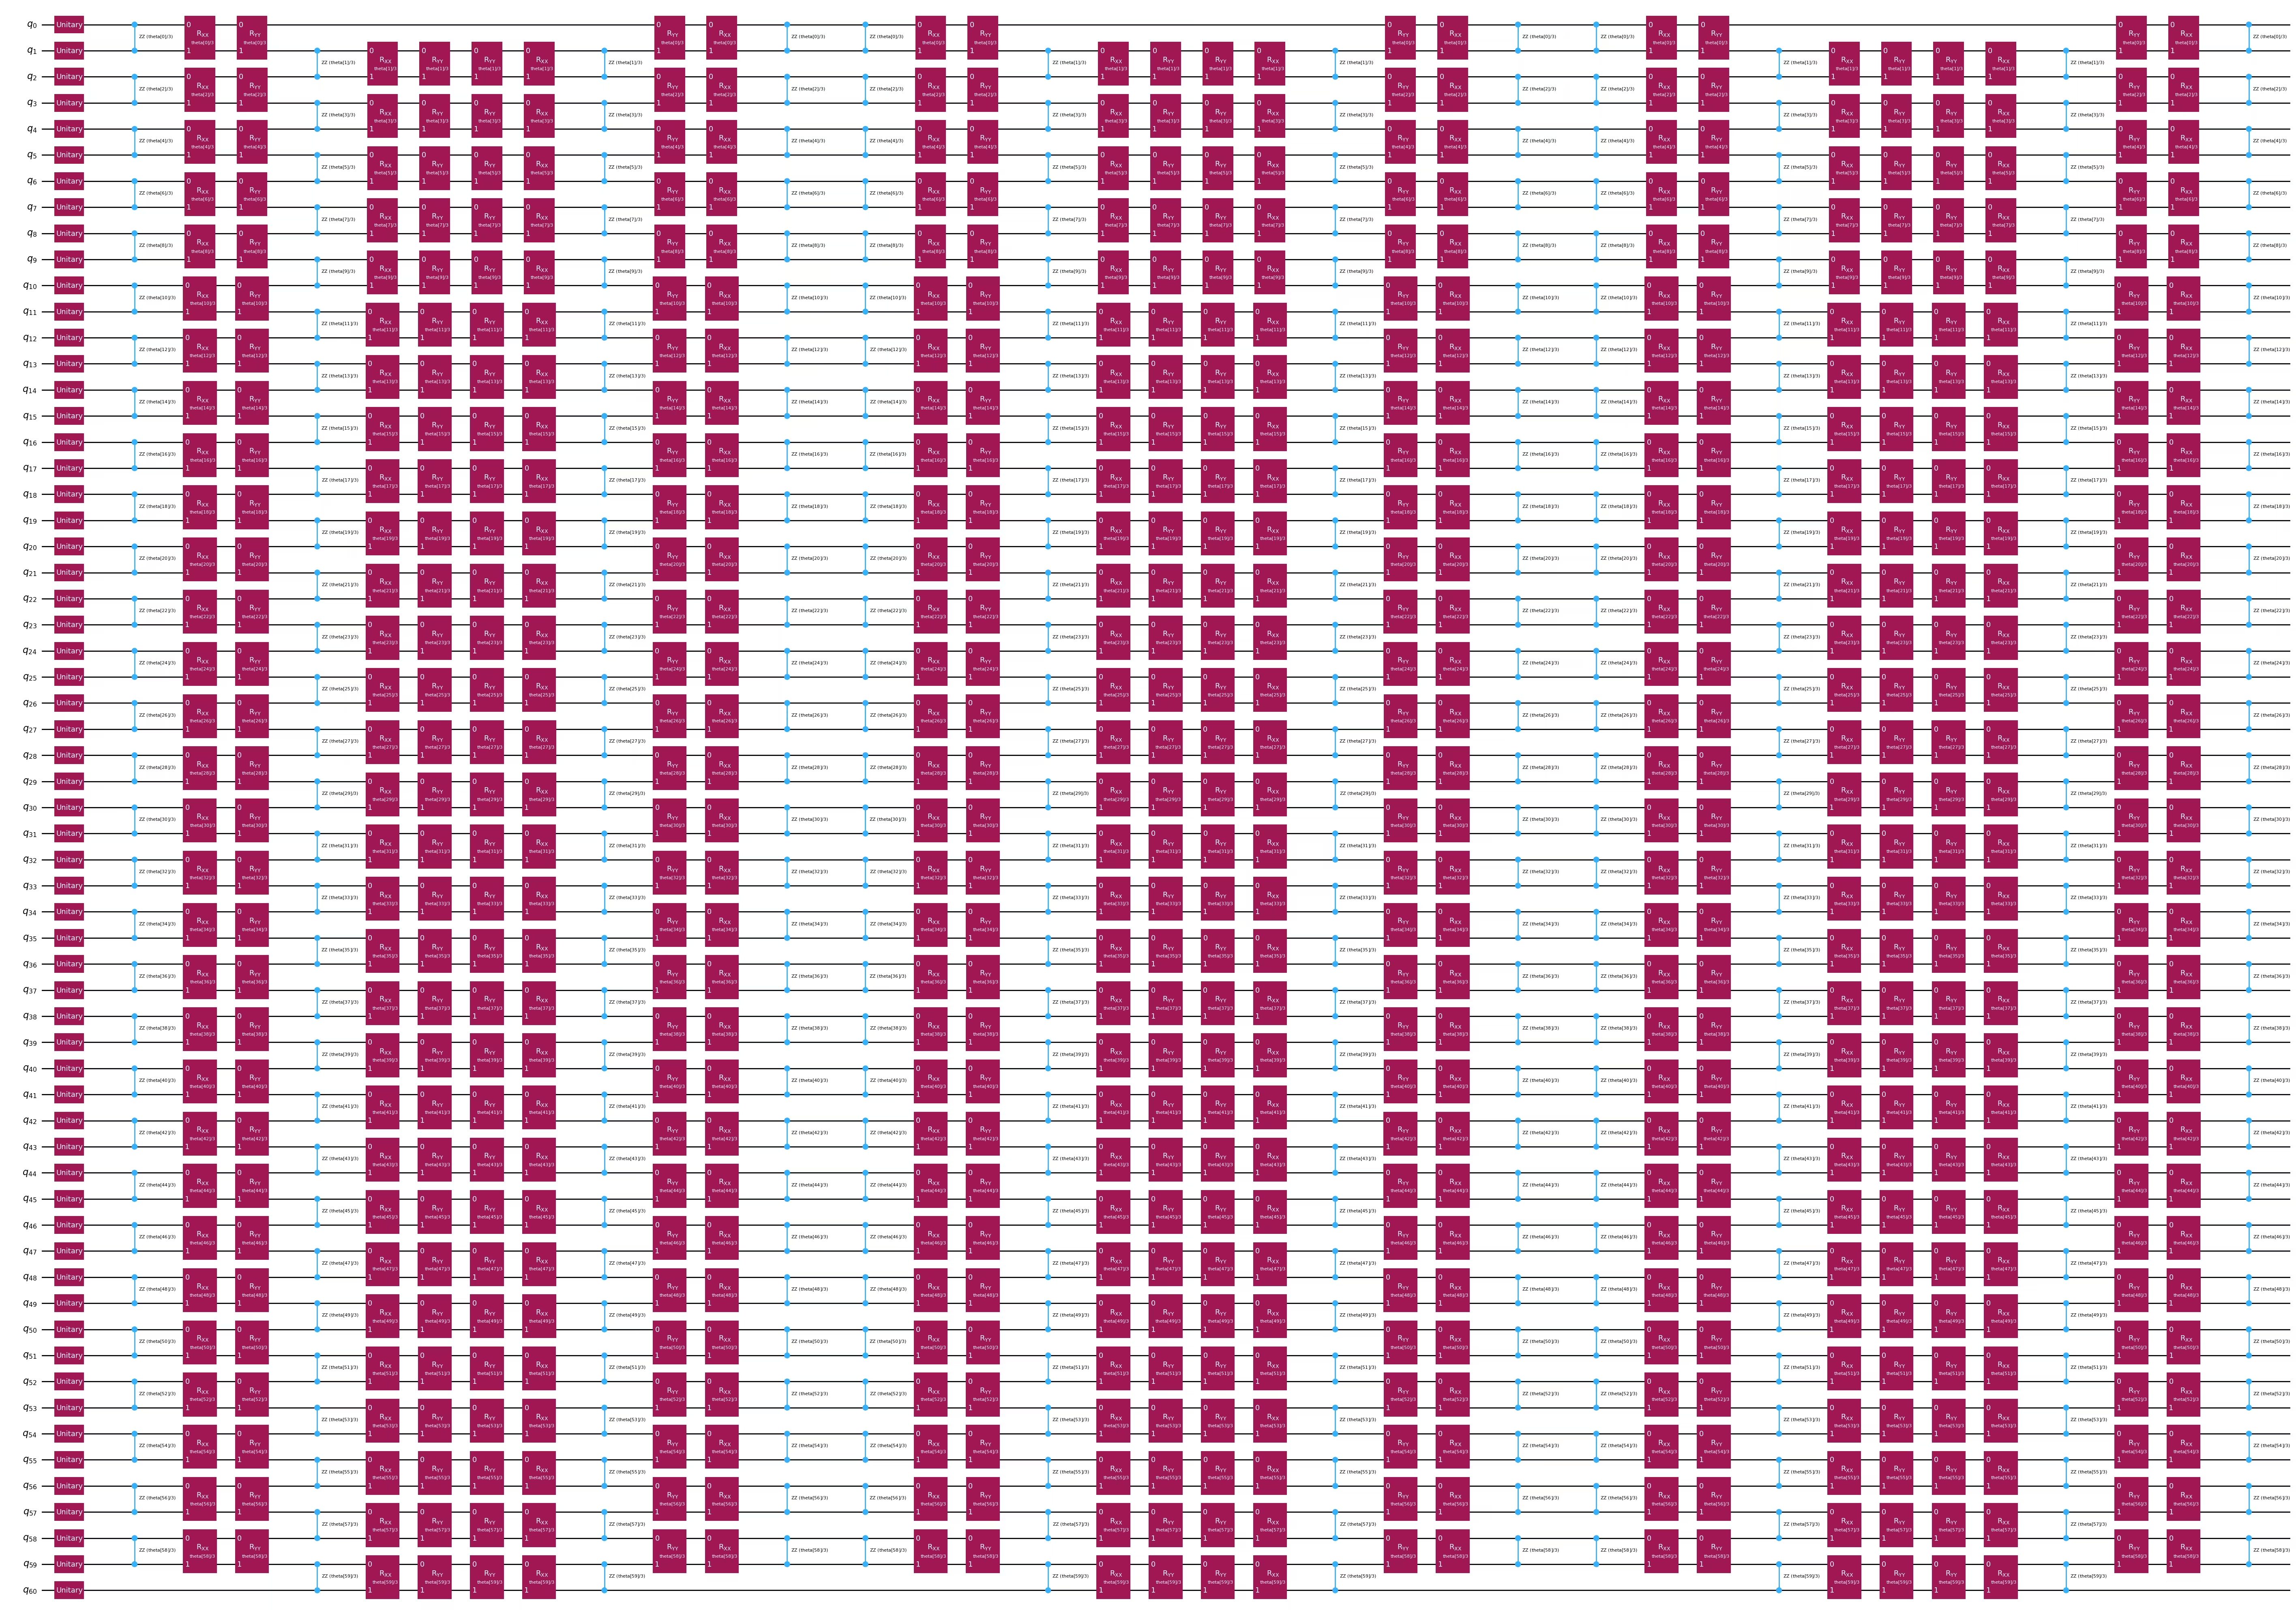
embed2.draw(output="mpl", style="iqp", fold=-1)
ステップ3:Qiskitプリミティブを使用した実行
1-RDMの測定
このステップでは、量子特徴マップの射影測定を通じてすべての単一量子ビット縮約密度行列(1-RDM)を取得します。これらは後ほど古典的な指数カーネル関数に入力されます。
全データに対して実行する前に、データセットから単一のデータポイントを用いて1-RDMを計算する方法を見てみましょう。1-RDMは、すべての量子ビットに対するパウリ X、Y、Z 演算子の単一量子ビット測定の集合です。これは、単一量子ビットのRDMが以下のように完全に表現できるためです。
まず、使用するバックエンドを選択します。
service = QiskitRuntimeService()
backend = service.least_busy(
    operational=True, simulator=False, min_num_qubits=133
)
target = backend.target
次に、量子回路を実行して射影を測定します。ゼロノイズ外挿(ZNE)を含むエラー緩和を有効にしていることに注意してください。
# Let's select the ZZFeatureMap embedding for this example
qc = embed
num_qubits = feature_dimension

# Identity operator on all qubits
id = "I" * num_qubits

# Let's select the first training datapoint as an example
parameters = train_data[0]

# Bind parameter to the circuit and simplify it
qc_bound = qc.assign_parameters(parameters)
transpiler = generate_preset_pass_manager(
    optimization_level=3, basis_gates=["u3", "cz"]
)
transpiled_circuit = transpiler.run(qc_bound)

# Transpile for hardware
transpiler = generate_preset_pass_manager(optimization_level=3, target=target)
transpiled_circuit = transpiler.run(transpiled_circuit)

# We group all commuting observables
# These groups are the Pauli X, Y and Z operators on individual qubits
observables_x = [
    SparsePauliOp(id[:i] + "X" + id[(i + 1) :]).apply_layout(
        transpiled_circuit.layout
    )
    for i in range(num_qubits)
]
observables_y = [
    SparsePauliOp(id[:i] + "Y" + id[(i + 1) :]).apply_layout(
        transpiled_circuit.layout
    )
    for i in range(num_qubits)
]
observables_z = [
    SparsePauliOp(id[:i] + "Z" + id[(i + 1) :]).apply_layout(
        transpiled_circuit.layout
    )
    for i in range(num_qubits)
]

# We define the primitive unified blocs (PUBs) consisting of the embedding circuit,
# set of observables and the circuit parameters
pub_x = (transpiled_circuit, observables_x)
pub_y = (transpiled_circuit, observables_y)
pub_z = (transpiled_circuit, observables_z)

# Experiment options for error mitigation
num_randomizations = 300
shots_per_randomization = 100
noise_factors = [1, 3, 5]

experimental_opts = {}
experimental_opts["resilience"] = {
    "measure_mitigation": True,
    "zne_mitigation": True,
    "zne": {
        "noise_factors": noise_factors,
        "amplifier": "gate_folding",
        "extrapolated_noise_factors": [0] + noise_factors,
    },
}
experimental_opts["twirling"] = {
    "num_randomizations": num_randomizations,
    "shots_per_randomization": shots_per_randomization,
    "strategy": "active-accum",
}

# We define and run the estimator to obtain <X>, <Y> and <Z> on all qubits
estimator = Estimator(mode=backend, options=experimental_opts)

job = estimator.run([pub_x, pub_y, pub_z])
次に、結果を取得します。
job_result_x = job.result()[0].data.evs
job_result_y = job.result()[1].data.evs
job_result_z = job.result()[2].data.evs
print(job_result_x)
print(job_result_y)
print(job_result_z)
[ 3.67865951e-03  1.01158571e-02 -3.95790878e-02  6.33984326e-03
  1.86035759e-02 -2.91533268e-02 -1.06374793e-01  4.48873518e-18
  4.70201764e-02  3.53997968e-02  2.53130819e-02  3.23903401e-02
  6.06327843e-03  1.16313667e-02 -1.12387504e-02 -3.18457725e-02
 -4.16445718e-04 -1.45609602e-03 -4.21737114e-01  2.83705669e-02
  6.91332890e-03 -7.45363001e-02 -1.20139326e-02 -8.85566135e-02
 -3.22648394e-02 -3.24228074e-02  6.20431299e-04  3.04225434e-03
  5.72795792e-03  1.11288428e-02  1.50395861e-01  9.18380197e-02
  1.02553163e-01  2.98312847e-02 -3.30298912e-01 -1.13979648e-01
  4.49159340e-03  8.63861493e-02  3.05666566e-02  2.21463145e-04
  1.45946735e-02  8.54537275e-03 -8.09805979e-02 -2.92608104e-02
 -3.91243644e-02 -3.96632760e-02 -1.41187613e-01 -1.07363243e-01
  1.81089440e-02  2.70778895e-02  1.45139414e-02  2.99480458e-02
  4.99137134e-02  7.08789852e-02  4.30565759e-02  8.71287156e-02
  1.04334798e-01  7.72191962e-02  7.10059720e-02  1.04650403e-01]
[-7.31765102e-05  7.42669174e-03  9.82277344e-03  5.92638249e-02
  4.24120486e-02 -9.06473416e-03  4.55057675e-03  8.43494094e-03
  6.92097339e-02 -6.82234424e-02  6.13509008e-02  3.94200491e-02
 -1.24037979e-02  1.01976642e-01  7.90538600e-03 -7.19726160e-02
 -1.19501703e-16 -1.03796614e-02  7.37382463e-02  1.97238568e-01
 -3.59250635e-02 -2.67554009e-02  3.55010633e-02  7.68877990e-02
  6.50677589e-05 -6.59298767e-03 -1.23719487e-02 -6.41938151e-02
  1.95603072e-02 -2.48448551e-02  5.17784810e-02 -5.93767100e-02
  3.11897681e-02 -3.91959720e-18 -4.47769148e-03  1.39202197e-01
 -6.56387523e-02 -5.85665483e-02  9.52905894e-03 -8.61460731e-02
  3.91790656e-02 -1.27544375e-01  1.63712244e-01  3.36816934e-04
  2.26230028e-02 -2.45023393e-05  4.95635588e-03  1.44779564e-01
  3.71625177e-02  3.65675948e-03  2.83694017e-02 -7.10500602e-02
 -1.15467702e-01  6.21712129e-03 -4.80958959e-02  2.21021066e-02
  7.99062499e-02 -1.87164076e-02 -3.67100369e-02 -2.38923731e-02]
[ 6.85871605e-01  5.07725024e-01  8.71024642e-03  3.34823455e-02
  4.58684961e-02  9.44384189e-17 -4.46829296e-02 -2.91296778e-02
  4.15466461e-02  2.89628330e-02  1.88624017e-03  5.37110446e-02
  2.59579053e-03  1.39327071e-02 -2.90781778e-02  5.07209866e-03
  5.83403000e-02  2.60764440e-02  4.45999706e-17 -6.66701417e-03
  3.03215873e-01  2.26172533e-02  2.43105960e-02  4.98861041e-18
 -2.45530791e-02  6.26940708e-02  1.21058073e-02  2.76675948e-04
  2.63980996e-02  2.58302364e-02  7.47856723e-02  8.42728943e-02
  5.70989097e-02  6.92955086e-02 -5.68313712e-03  1.32199452e-01
  8.90511238e-02 -3.45204621e-02 -1.05445836e-01  6.03864150e-03
  2.16291384e-02  8.22303162e-03  1.00856715e-02  6.28973151e-02
  6.26727169e-02  6.15399206e-02  9.67320897e-02  1.03045269e-16
  1.79688783e-01 -1.59960520e-02 -1.15422952e-02  9.60200470e-03
  6.58396672e-02  7.78329830e-03  6.53226955e-02  2.45778685e-03
  4.36694753e-03  5.75098762e-03 -2.48896201e-02  8.33740755e-05]
回路のサイズと2量子ビットゲートの深さを出力します。
print(f"qubits: {qc.num_qubits}")
print(
    f"2q-depth: {transpiled_circuit.depth(lambda x: x.operation.num_qubits==2)}"
)
print(
    f"2q-size: {transpiled_circuit.size(lambda x: x.operation.num_qubits==2)}"
)
print(f"Operator counts: {transpiled_circuit.count_ops()}")
transpiled_circuit.draw("mpl", fold=-1, style="clifford", idle_wires=False)
qubits: 60
2q-depth: 64
2q-size: 1888
Operator counts: OrderedDict({'rz': 6016, 'sx': 4576, 'cz': 1888, 'x': 896, 'barrier': 31})

これで、訓練データセット全体をループしてすべての1-RDMを取得できます。
また、量子ハードウェア上で実行した実験の結果も提供しています。以下のフラグを True に設定してご自身で訓練を実行することも、提供された射影結果を使用することもできます。
# Set this to True if you want to run the training on hardware
run_experiment = False
# Identity operator on all qubits
id = "I" * num_qubits

# projections_train[i][j][k] will be the expectation value of the j-th
# Pauli operator (0: X, 1: Y, 2: Z) of datapoint i on qubit k
projections_train = []
jobs_train = []

# Experiment options for error mitigation
num_randomizations = 300
shots_per_randomization = 100
noise_factors = [1, 3, 5]

experimental_opts = {}
experimental_opts["resilience"] = {
    "measure_mitigation": True,
    "zne_mitigation": True,
    "zne": {
        "noise_factors": noise_factors,
        "amplifier": "gate_folding",
        "return_all_extrapolated": True,
        "return_unextrapolated": True,
        "extrapolated_noise_factors": [0] + noise_factors,
    },
}
experimental_opts["twirling"] = {
    "num_randomizations": num_randomizations,
    "shots_per_randomization": shots_per_randomization,
    "strategy": "active-accum",
}
options = EstimatorOptions(experimental=experimental_opts)

if run_experiment:
    with Batch(backend=backend):
        for i in tqdm.tqdm(
            range(len(train_data)), desc="Training data progress"
        ):
            # Get training sample
            parameters = train_data[i]

            # Bind parameter to the circuit and simplify it
            qc_bound = qc.assign_parameters(parameters)
            transpiler = generate_preset_pass_manager(
                optimization_level=3, basis_gates=["u3", "cz"]
            )
            transpiled_circuit = transpiler.run(qc_bound)

            # Transpile for hardware
            transpiler = generate_preset_pass_manager(
                optimization_level=3, target=target
            )
            transpiled_circuit = transpiler.run(transpiled_circuit)

            # We group all commuting observables
            # These groups are the Pauli X, Y and Z operators on individual qubits
            observables_x = [
                SparsePauliOp(id[:i] + "X" + id[(i + 1) :]).apply_layout(
                    transpiled_circuit.layout
                )
                for i in range(num_qubits)
            ]
            observables_y = [
                SparsePauliOp(id[:i] + "Y" + id[(i + 1) :]).apply_layout(
                    transpiled_circuit.layout
                )
                for i in range(num_qubits)
            ]
            observables_z = [
                SparsePauliOp(id[:i] + "Z" + id[(i + 1) :]).apply_layout(
                    transpiled_circuit.layout
                )
                for i in range(num_qubits)
            ]

            # We define the primitive unified blocs (PUBs) consisting
            # of the embedding circuit,
            # set of observables and the circuit parameters
            pub_x = (transpiled_circuit, observables_x)
            pub_y = (transpiled_circuit, observables_y)
            pub_z = (transpiled_circuit, observables_z)

            # We define and run the estimator to obtain <X>, <Y> and <Z>
            # on all qubits
            estimator = Estimator(options=options)

            job = estimator.run([pub_x, pub_y, pub_z])
            jobs_train.append(job)
Training data progress: 100%|██████████| 172/172 [13:03<00:00, 4.55s/it]
ジョブが完了したら、結果を取得できます。
if run_experiment:
    for i in tqdm.tqdm(
        range(len(train_data)), desc="Retrieving training data results"
    ):
        # Completed job
        job = jobs_train[i]

        # Job results
        job_result_x = job.result()[0].data.evs
        job_result_y = job.result()[1].data.evs
        job_result_z = job.result()[2].data.evs

        # Record <X>, <Y> and <Z> on all qubits for the current datapoint
        projections_train.append([job_result_x, job_result_y, job_result_z])
テストセットについても同様の処理を繰り返します。
# Identity operator on all qubits
id = "I" * num_qubits

# projections_test[i][j][k] will be the expectation value of the
# j-th Pauli operator (0: X, 1: Y, 2: Z) of datapoint i on qubit k
projections_test = []
jobs_test = []

# Experiment options for error mitigation
num_randomizations = 300
shots_per_randomization = 100
noise_factors = [1, 3, 5]

experimental_opts = {}
experimental_opts["resilience"] = {
    "measure_mitigation": True,
    "zne_mitigation": True,
    "zne": {
        "noise_factors": noise_factors,
        "amplifier": "gate_folding",
        "return_all_extrapolated": True,
        "return_unextrapolated": True,
        "extrapolated_noise_factors": [0] + noise_factors,
    },
}
experimental_opts["twirling"] = {
    "num_randomizations": num_randomizations,
    "shots_per_randomization": shots_per_randomization,
    "strategy": "active-accum",
}
options = EstimatorOptions(experimental=experimental_opts)

if run_experiment:
    with Batch(backend=backend):
        for i in tqdm.tqdm(range(len(test_data)), desc="Test data progress"):
            # Get test sample
            parameters = test_data[i]

            # Bind parameter to the circuit and simplify it
            qc_bound = qc.assign_parameters(parameters)
            transpiler = generate_preset_pass_manager(
                optimization_level=3, basis_gates=["u3", "cz"]
            )
            transpiled_circuit = transpiler.run(qc_bound)

            # Transpile for hardware
            transpiler = generate_preset_pass_manager(
                optimization_level=3, target=target
            )
            transpiled_circuit = transpiler.run(transpiled_circuit)

            # We group all commuting observables
            # These groups are the Pauli X, Y and Z operators on individual qubits
            observables_x = [
                SparsePauliOp(id[:i] + "X" + id[(i + 1) :]).apply_layout(
                    transpiled_circuit.layout
                )
                for i in range(num_qubits)
            ]
            observables_y = [
                SparsePauliOp(id[:i] + "Y" + id[(i + 1) :]).apply_layout(
                    transpiled_circuit.layout
                )
                for i in range(num_qubits)
            ]
            observables_z = [
                SparsePauliOp(id[:i] + "Z" + id[(i + 1) :]).apply_layout(
                    transpiled_circuit.layout
                )
                for i in range(num_qubits)
            ]

            # We define the primitive unified blocs (PUBs) consisting of
            # the embedding circuit,
            # set of observables and the circuit parameters
            pub_x = (transpiled_circuit, observables_x)
            pub_y = (transpiled_circuit, observables_y)
            pub_z = (transpiled_circuit, observables_z)

            # We define and run the estimator to obtain <X>, <Y> and <Z> on all qubits
            estimator = Estimator(options=options)

            job = estimator.run([pub_x, pub_y, pub_z])
            jobs_test.append(job)
Test data progress: 100%|██████████| 74/74 [00:13<00:00, 5.56it/s]
先ほどと同様に結果を取得できます。
if run_experiment:
    for i in tqdm.tqdm(
        range(len(test_data)), desc="Retrieving test data results"
    ):
        # Completed job
        job = jobs_test[i]

        # Job results
        job_result_x = job.result()[0].data.evs
        job_result_y = job.result()[1].data.evs
        job_result_z = job.result()[2].data.evs

        # Record <X>, <Y> and <Z> on all qubits for the current datapoint
        projections_test.append([job_result_x, job_result_y, job_result_z])
ステップ4:後処理と所望の古典フォーマットでの結果返却
射影量子カーネルの定義
射影量子カーネルは、以下のカーネル関数で定義されます:
上記の式において、 は調整可能なハイパーパラメータです。 はカーネル行列 の要素です。
1-RDM の定義を用いると、カーネル関数内の各項は (ただし )として評価できることがわかります。これらの期待値は、まさに上記で測定したものです。
scikit-learn を使用すると、カーネルの計算をさらに容易に行うことができます。これは、すぐに利用可能な動径基底関数('rbf')カーネル のおかげです。まず、新しい射影済みの訓練データセットとテストデータセットを2次元配列に整形する必要があります。
なお、データセット全体の処理にはQPU上で約80分かかる場合があります。チュートリアルの残りの部分を容易に実行できるようにするため、以前に実行した実験からの射影結果も提供しています(これらは Download dataset コードブロックでダウンロードしたファイルに含まれています)。ご自身で訓練を実行した場合は、その結果を使用してチュートリアルを続けることができます。
if run_experiment:
    projections_train = np.array(projections_train).reshape(
        len(projections_train), -1
    )
    projections_test = np.array(projections_test).reshape(
        len(projections_test), -1
    )
else:
    projections_train = np.loadtxt("projections_train.txt")
    projections_test = np.loadtxt("projections_test.txt")
サポートベクターマシン(SVM)
この事前計算済みカーネルに対して古典SVMを実行し、テストセットと訓練セット間のカーネルを用いて予測を行うことができます。
# Range of 'C' and 'gamma' values as SVC hyperparameters
C_range = [0.001, 0.005, 0.007]
C_range.extend([x * 0.01 for x in range(1, 11)])
C_range.extend([x * 0.25 for x in range(1, 60)])
C_range.extend(
    [
        20,
        50,
        100,
        200,
        500,
        700,
        1000,
        1100,
        1200,
        1300,
        1400,
        1500,
        1700,
        2000,
    ]
)

gamma_range = ["auto", "scale", 0.001, 0.005, 0.007]
gamma_range.extend([x * 0.01 for x in range(1, 11)])
gamma_range.extend([x * 0.25 for x in range(1, 60)])
gamma_range.extend([20, 50, 100])

param_grid = dict(C=C_range, gamma=gamma_range)

# Support vector classifier
svc = SVC(kernel="rbf")

# Define the cross validation
cv = StratifiedKFold(n_splits=10)

# Grid search for hyperparameter tuning (q: quantum)
grid_search_q = GridSearchCV(
    svc, param_grid, cv=cv, verbose=1, n_jobs=-1, scoring="f1_weighted"
)
grid_search_q.fit(projections_train, train_labels)

# Best model with best parameters
best_svc_q = grid_search_q.best_estimator_
print(
    f"The best parameters are {grid_search_q.best_params_} with a score of {grid_search_q.best_score_:.4f}"
)

# Test accuracy
accuracy_q = best_svc_q.score(projections_test, test_labels)
print(f"Test accuracy with best model: {accuracy_q:.4f}")
Fitting 10 folds for each of 6622 candidates, totalling 66220 fits
The best parameters are {'C': 8.5, 'gamma': 0.01} with a score of 0.6980
Test accuracy with best model: 0.8108
古典ベンチマーク
量子射影を行わずに、動径基底関数をカーネルとして使用した古典SVMを実行できます。この結果が古典ベンチマークとなります。
# Support vector classifier
svc = SVC(kernel="rbf")

# Grid search for hyperparameter tuning (c: classical)
grid_search_c = GridSearchCV(
    svc, param_grid, cv=cv, verbose=1, n_jobs=-1, scoring="f1_weighted"
)
grid_search_c.fit(train_data, train_labels)

# Best model with best parameters
best_svc_c = grid_search_c.best_estimator_
print(
    f"The best parameters are {grid_search_c.best_params_} with a score of {grid_search_c.best_score_:.4f}"
)

# Test accuracy
accuracy_c = best_svc_c.score(test_data, test_labels)
print(f"Test accuracy with best model: {accuracy_c:.4f}")
Fitting 10 folds for each of 6622 candidates, totalling 66220 fits
The best parameters are {'C': 10.75, 'gamma': 0.04} with a score of 0.7830
Test accuracy with best model: 0.7432
付録:データセットが学習タスクにおいて量子優位性の可能性を持つことの検証
すべてのデータセットがPQKの使用による潜在的な優位性を提供するわけではありません。特定のデータセットがPQKから恩恵を受けるかどうかを確認するための予備テストとして使用できる理論的な上界が存在します。これを定量化するため、Power of data in quantum machine learning [2] の著者らは、古典モデル複雑度および量子モデル複雑度、ならびに古典モデルと量子モデルの幾何学的分離と呼ばれる量を定義しています。PQKによる潜在的な量子優位性を期待するためには、古典カーネルと量子射影カーネル間の幾何学的分離がおおよそ のオーダー( は訓練サンプル数)である必要があります。この条件が満たされた場合、次にモデル複雑度の確認に進みます。古典モデル複雑度が のオーダーであり、量子射影モデル複雑度が よりも十分に小さい場合、PQKによる潜在的な優位性が期待できます。 幾何学的分離は以下のように定義されます([2] の F19):
# Gamma values used in best models above
gamma_c = grid_search_c.best_params_["gamma"]
gamma_q = grid_search_q.best_params_["gamma"]

# Regularization parameter used in the best classical model above
C_c = grid_search_c.best_params_["C"]
l_c = 1 / C_c

# Classical and quantum kernels used above
K_c = rbf_kernel(train_data, train_data, gamma=gamma_c)
K_q = rbf_kernel(projections_train, projections_train, gamma=gamma_q)

# Intermediate matrices in the equation
K_c_sqrt = sqrtm(K_c)
K_q_sqrt = sqrtm(K_q)
K_c_inv = inv(K_c + l_c * np.eye(K_c.shape[0]))
K_multiplication = (
    K_q_sqrt @ K_c_sqrt @ K_c_inv @ K_c_inv @ K_c_sqrt @ K_q_sqrt
)

# Geometric separation
norm = np.linalg.norm(K_multiplication, ord=np.inf)
g_cq = np.sqrt(norm)
print(
    f"Geometric separation between classical and quantum kernels is {g_cq:.4f}"
)

print(np.sqrt(len(train_data)))
Geometric separation between classical and quantum kernels is 1.5440
13.114877048604
モデル複雑度は以下のように定義されます([2] の M1):
# Model complexity of the classical kernel

# Number of training data
N = len(train_data)

# Predicted labels
pred_labels = best_svc_c.predict(train_data)
pred_matrix = np.outer(pred_labels, pred_labels)

# Intermediate terms
K_c_inv = inv(K_c + l_c * np.eye(K_c.shape[0]))

# First term
first_sum = np.sum((K_c_inv @ K_c_inv) * pred_matrix)
first_term = l_c * np.sqrt(first_sum / N)

# Second term
second_sum = np.sum((K_c_inv @ K_c @ K_c_inv) * pred_matrix)
second_term = np.sqrt(second_sum / N)

# Model complexity
s_c = first_term + second_term
print(f"Classical model complexity is {s_c:.4f}")
Classical model complexity is 1.3578
# Model complexity of the projected quantum kernel

# Number of training data
N = len(projections_train)

# Predicted labels
pred_labels = best_svc_q.predict(projections_train)
pred_matrix = np.outer(pred_labels, pred_labels)

# Regularization parameter used in the best classical model above
C_q = grid_search_q.best_params_["C"]
l_q = 1 / C_q

# Intermediate terms
K_q_inv = inv(K_q + l_q * np.eye(K_q.shape[0]))

# First term
first_sum = np.sum((K_q_inv @ K_q_inv) * pred_matrix)
first_term = l_q * np.sqrt(first_sum / N)

# Second term
second_sum = np.sum((K_q_inv @ K_q @ K_q_inv) * pred_matrix)
second_term = np.sqrt(second_sum / N)

# Model complexity
s_q = first_term + second_term
print(f"Quantum model complexity is {s_q:.4f}")
Quantum model complexity is 1.5806
次のステップ
この内容に興味を持たれた方は、以下の資料もご覧ください。
- IBM Quantum Learning の詳細な 量子機械学習コース
- Quantum kernel training チュートリアル
参考文献
- Utro, Filippo, et al. "Enhanced Prediction of CAR T-Cell Cytotoxicity with Quantum-Kernel Methods." arXiv preprint arXiv:2507.22710 (2025).
- Huang, Hsin-Yuan, et al. "Power of data in quantum machine learning." Nature communications 12.1 (2021): 2631.
- Daniels, Kyle G., et al. "Decoding CAR T cell phenotype using combinatorial signaling motif libraries and machine learning." Science 378.6625 (2022): 1194-1200.